How To Change A Treadmill Belt
If you own your treadmill long enough, you’ll eventually have to replace the belt. As with anything mechanical these days, belt replacement isn’t exactly rocket science. It does however require a reading of the instructions and following of directions. The best way to lengthen the life of your treadmill belt is to keep it clean, lubricated, and aligned. But if you’re a heavy runner and putting on the miles, that 2-ply strip rubbing across the deck will eventually wear down. If your belt is starting to slip, drag, or perhaps has a tear, it’s time to consider a new belt.
Before engaging in any type of treadmill maintenance, be sure to check the manufacturer’s instructions. Models do differ a bit in design. While the basics of treadmill belt replacement will be quite similar, you’ll want to use the right tools for the machine in question. If you’re working with a Horizon treadmill for instance, their corporate website has a step-by-step guide and video series related to their units on their website. NordicTrack also has a guide for its units. Read below to get the step-by-steps appropriate for belt replacement on most units.
Step-By-Step Belt Replacement
Before you get started, check your treadmill instruction manual for a list of the tools you’ll need. If you don’t have that manual on hand, the following are commonly used:
- Phillips Head Screw Driver
- Allen Wrenches
- Electric Drill
Step 1:
This is for your own safety as well as the machine. You don’t want the unit to accidentally kick on while you’re working.
Step 2:
Remove the motor hood. You’ll find the screws up at the front end of the machine, with two on each side as well as two on the front. Once you pop off the motor lid, fold the treadmill upright and lock it into place, if it’s a folding unit. If it’s not a folding unit, leave it down and proceed to Step 3.
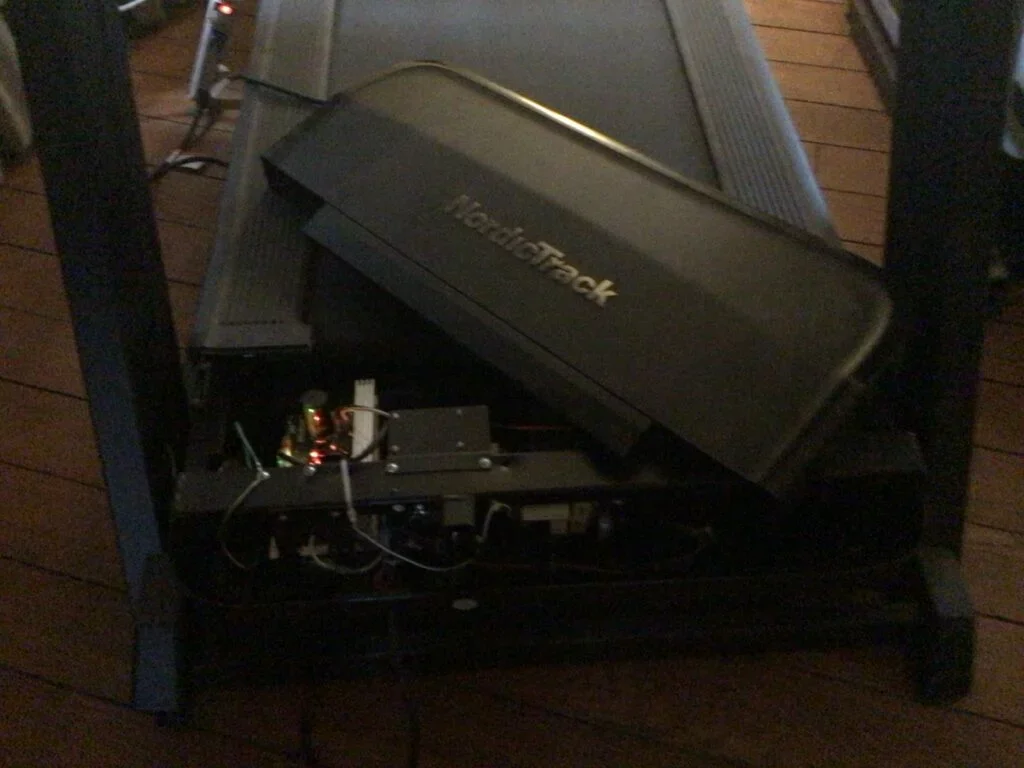
Removing the motor hood from a treadmill typically requires a screw driver or Allen wrench.
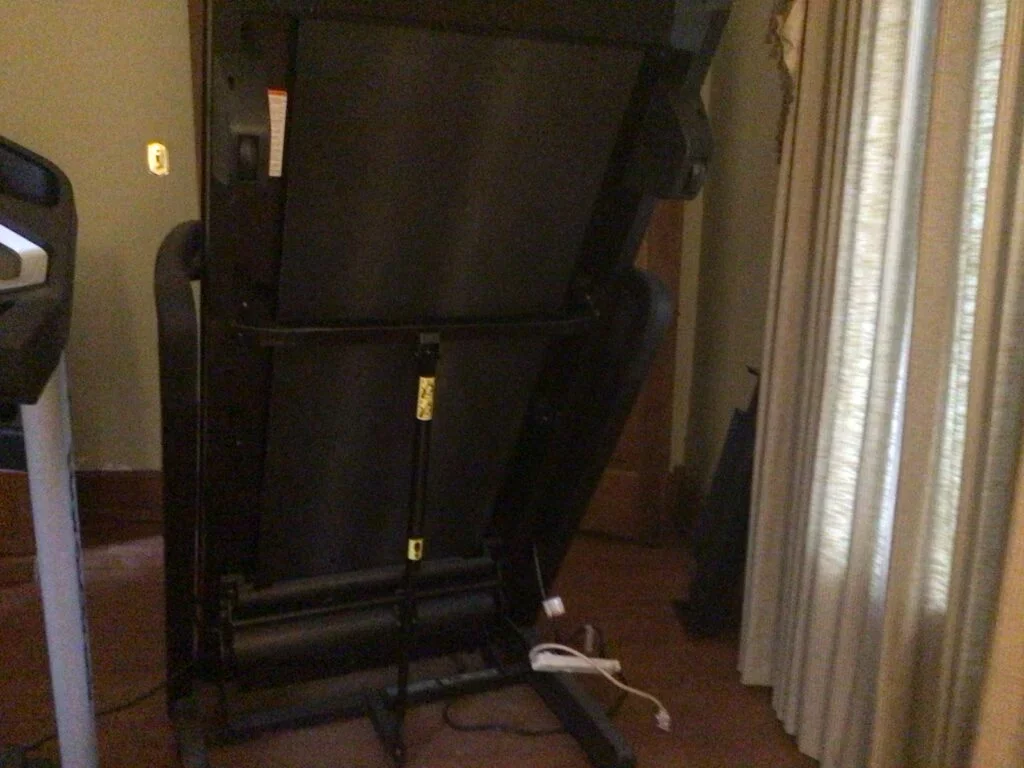
If changing the belt on a folding treadmill, you’ll want to pop the treadmill up and lock into place. Notice the electrical cord has been unplugged from the outlet.
Step 3:
Remove the screws from beneath the walking board on the right-hand side. If working with a folding treadmill popped up, this is easy. They’re up at the top of the right-hand side and fasten the right side of the foot rail to the platform. Once you do this, you should be able to lift the right side guard rail up and off the unit. With the guard rail off the unit, lower it back down to the ground.
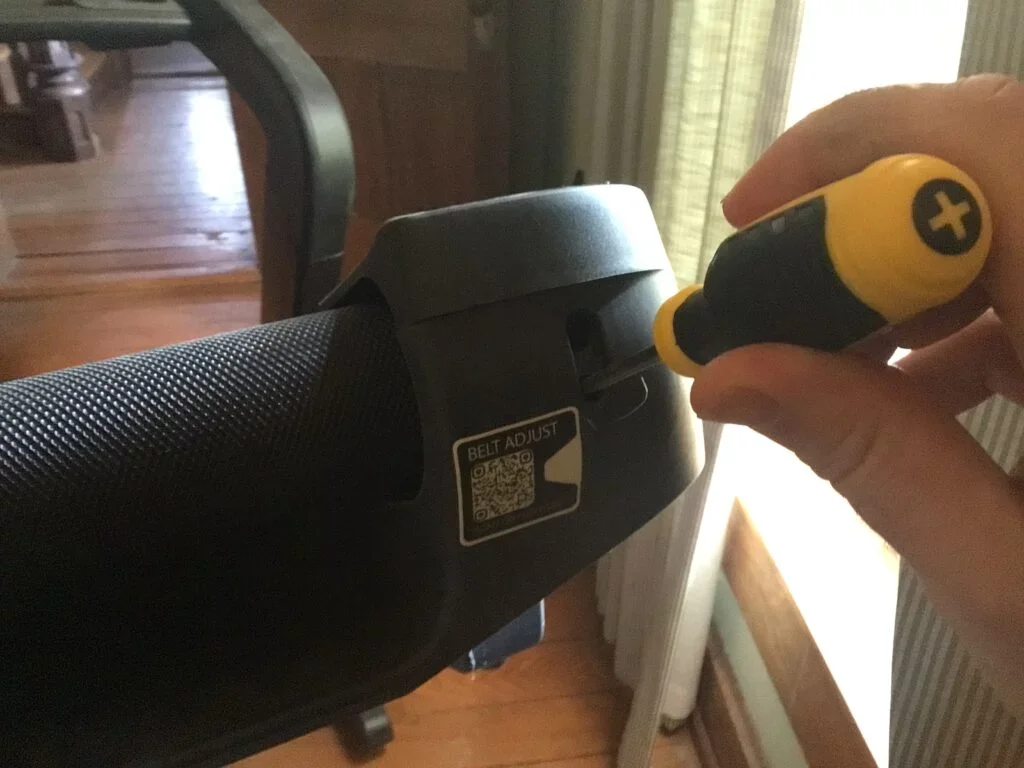
Locate the adjustment screws on the end of the treadmill and use a Phillips head screwdriver to loosen.
Step 4:
Use the Allen wrench to loosen the right-side belt. You’ll find this slot at the top and twist until the belt is loosened. This will allow you to access the rear roller and unfasten it from the belt. Loosen the nuts around the roller and remove it from the attachment. Remove the front and rear corner screws which keep the walking board attached to the frame. Lift up the right side of the walking platform and slide the belt off.

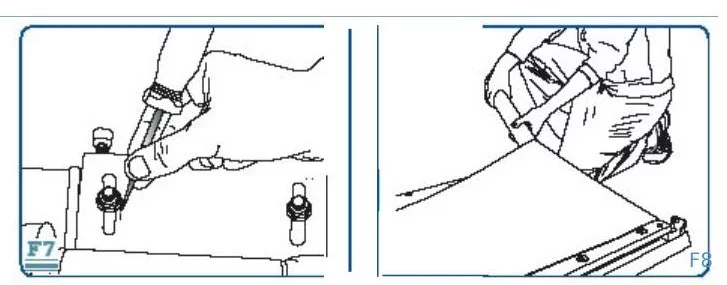
Removing the covers from the railing to access the belt is as simple as using a screwdriver. Photos by Horizon Treadmills of Johnson Fitness.
Step 5:
With the belt taken off the walking board, take this time to check the deck for any scratches or damage. Then, slide the new belt onto the deck. Be sure to make sure it’s snug and fits equally on both sides.
Step 6:
Fold the treadmill back into an upright position. Reinstall the right front and rear mounting screws to fasten the platform back to the frame. Lower the frame back to the ground and then reposition the roller into place, tightening it accordingly. Use the Allen wrench to re-tighten the belt. If the belt is properly tightened, you should be able to gently lift it two to three inches.
Step 7:
Re-install the right guard rail back onto the unit and screw it into place.
Step 8:
Place the front motor hood back onto the case and screw it back in place.
Step 9:
Plug the unit back into the power socket and test the treadmill to make sure the belt is secure and running straight.
More Resources
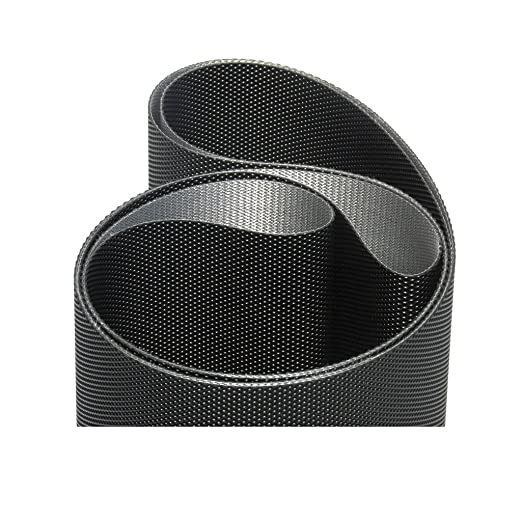
If you’re in need of a new treadmill belt, the first place to go is the manufacturer of course. You’ll need to know the size of the belt you need, which corresponds to the length of the deck – 20″ x 60″ or 20″ x 55″ etc… – and you’ll also need to know what type. Treadmill belts come in single or 2-ply, which refers to the number of layers. I recommend a 2-ply belt as they’re much more durable. The underlayer is cotton or some similar material and this provides a much smoother ride across the deck. You can always shop around. This ProForm belt available on Amazon.com retails for about $130 and is a 2-ply belt.
A new treadmill belt is certainly cheaper than a new treadmill, and there’s just no reason to go without. Changing a belt doesn’t have to be hard, but it always helps to have a few friends assist.
Frequently Asked Questions
Can I change a treadmill belt myself?
That depends on how handy you are. It's not rocket science, but you will need the right tools and instructions must be followed.
How long will it take to change a treadmill belt?
That depends on you. Most jobs should be done in under 45 minutes.
How much do replacement belts cost for treadmills?
That will depend on the size of the belt, whether a 20" x 55" or 20" x 60". It also depends on whether it's a 2-ply or single-ply. But most belts cost between $99 and $150 online.
Other Treadmill Reviews:
- Test HomePage
- NordicTrack Commercial X14i
- Echelon Stride
- NordicTrack C 590 Pro
- NordicTrack T 7.5 S - Pros & Cons (2024)
- Sole TD80 Treadmill Desk
- NordicTrack Commercial X11i
- NordicTrack T 8.5 S - Pros & Cons (2024)
- Horizon Elite T5
- Exerpeutic TF1000
- NordicTrack T 6.5 S - Pros & Cons (2024)
- ProForm Sport 5.0
- ProForm Premier 900
- ProForm ZT6
- NordicTrack FreeStride Trainer FS5i (Discontinued)
- Bowflex Max Trainer M5
- BowFlex TreadClimber TC100
- ProForm Power 795
- ProForm Sport 7.0
- NordicTrack Incline Trainer X15i
- NordicTrack C 1650 Treadmill
- Horizon Elite T9
- Official Boston Marathon Treadmill 4.0
- NordicTrack Treadmill Desk
- NordicTrack C 1630 Pro
- NordicTrack C 970 PRO
- Bowflex TC20 TreadClimber


